How to retrieve a climbing rope after rappelling
How do I retrieve my climbing rope after rappelling? If you don't want to leave your rope there or go back to retrieve it at the end of a rappel. You can refer to the following guide to help you quickly retrieve the rope at the end of a rappel!
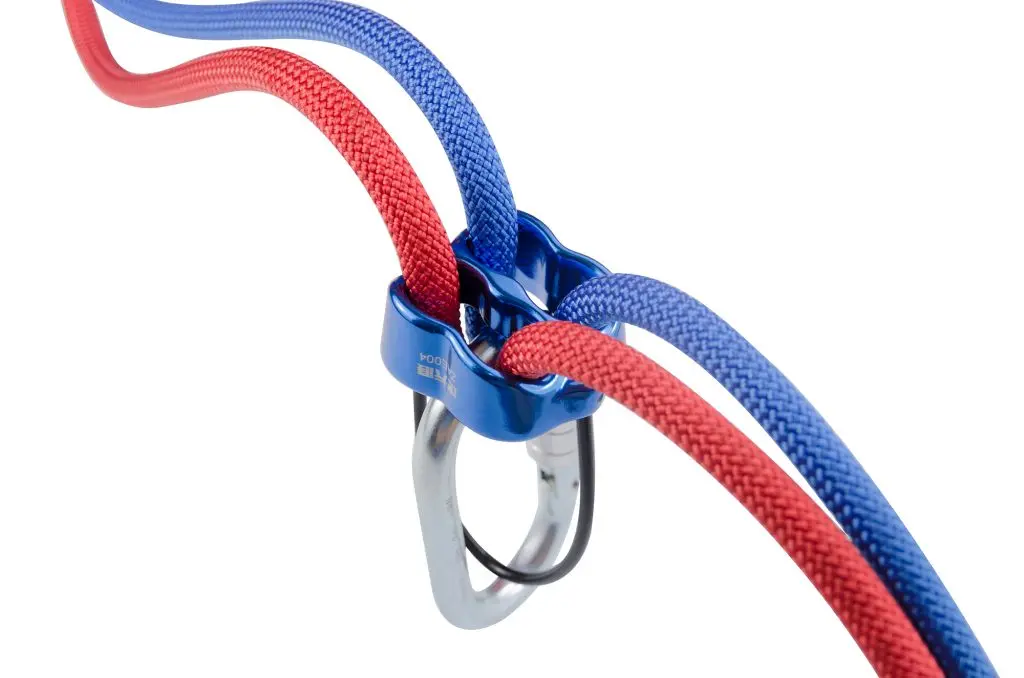
In order to retrieve the rope easily after rappelling, you usually need to set up anchors before rappelling, rather than simply fixing the rope and tying it to an anchor point. There are two common ways to do this; one method is to descend via two ropes, often referred to as a double rope descent, and the second method is to use an additional auxiliary rope to help retrieve the rope later. Both methods allow you to retrieve the rope after the rope descent.
How important is retrieving the rope? It avoids the need to buy a new rope every time you go out. Additionally, it helps keep the climbing route clean and allows you to keep the rope for next time if you do a multi-pitch climb or canyon traverse. In the following articles, we'll discuss how each method works and go through a step-by-step guide on how to operate each rope drop.
Method 1: Double Rope Descent
Use one rope, fold the rope from the center, then two strands of rope loaded into the descender (such as figure of 8 ring, ATC descender, etc.) for rappelling, after rappelling is completed, remove the descender, and pull the side of the rope to retrieve the rope.
Pros:
- Easy to operate.
- Higher security because it doesn't rely on knot fasteners.
- It is less likely that the rope is snagged.
Drawbacks:
- By folding the rope in half, you'll need to double the drop height length of the rope, which is bulkier.
A single rope passed through an anchor point is probably the most common form of rappel you will use. It is simple to set up, easy to maneuver, and easy to retrieve the rope.
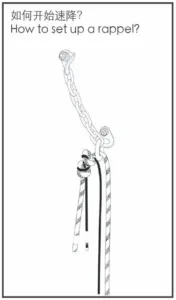
Use a single rope folded in half to descend to retrieve your rope:
- Set up a descending rope so that the rope hangs from the anchor point.
- The midpoint of the rope should be located between the anchor points and the sides should sag into a straight line, parallel to each other.
- Make sure both sides of the rope are tied with safety knots and touching the ground (if single descending).
- Perform a rope drop.
- Once you reach the ground, unhook the descender and untie the safety knots at each end of the rope.
- After untying the knot, simply pull on one side of the rope. The other side of the rope should be pulled up until it passes through the rappel anchor point and lands at your feet.
- Congratulations! You have completed the rappel and retrieved the rope.

Method 2: Tagline drop
Perform a single strand main rope rappel and then pull the rope down through a second, thinner auxiliary rope.
Pros:
- Requires less gear than a two-rope rappel.
- This is the most viable option if you do multiple rope drops.
Drawbacks:
- Setting up is most difficult.
- The most dangerous method.
Tagline descents are when you use a primary rope for rappelling, but then use a thin secondary rope to tie it to the top of the primary rope in order to pull it down once you reach the bottom.
On the surface, this is very similar to the double rope descent we just discussed. However, there is one key difference: in Tagline descents, you only use one primary rope for the rope descent. The second Tagline secondary rope is usually too thin to hold your weight.
Other than that, Tagline descents are set up very similarly to the double rope descents we just talked about. There are a couple important caveats:
- The thicker rope will be used for rappelling and it must pass through the anchor point. This will cause the knot to pull against the anchor point loop while you are weighted.
- In this method, you need to be extra careful to make sure your knot doesn't go through the anchor loop. In a double rope descent, this is just an inconvenience; but in a Tagline, it's deadly.
 To perform a Tagline drop, follow these steps:
- Pass through the anchor point through the descending rope cord.
- Tie the primary rope to the Tagline secondary rope using the correct knot or blocking device to ensure it stays in place.
- Tie yourself to the rappelling main rope.
- Complete a rappel and unattach from the rope.
- Undo the spare safety knot at the end of the descending rope line.
- Pull the Tagline Auxiliary Rope. This will pull your descending rope cord up through the anchor point and back down to the ground.
In summary, there are two main ways to retrieve the rope after rappelling. The main thing you need to be aware of is not to knot the rope directly to the anchor point as this will make it impossible to retrieve it. Instead, use the method described above to do so.
Please note that the above steps provide general guidance only. Always follow proper mountaineering techniques and safety guidelines when undertaking any mountaineering activity and take appropriate measures based on personal experience and training. Please have a certified instructor train you before attempting these new techniques.
Latest Outdoor Tutorials
ZOUTIANYA will regularly update the outdoor tutorials to bring easy-to-understand knowledge to our customers!


 Network Security No. 32120302000350